-
 Boris Parak authored
Using OpenStack's Web Interface
This introduction is intended for users that want to start a larger number of virtual machine instances in the cloud or use advanced features through the Graphical User Interface of OpenStack.
The process is similar to creating a virtual machine instance in Quickstart, you need to
- sign in via the MetaCentrum Cloud web interface,
- create an ssh key pair or use an existing key pair,
- create virtual private network,
- create virtual router,
- join virtual private network to internet through router interfaces,
- set up or update a security group,
- start a virtual machine instance,
- allocate floating IP address (add or remove IP address to/from virtual machine instance)
- log in to the running instance using ssh (secure shell),
- (optional) create new volume (add/remove volume to/from virtual machine instance).
Sign In
The web interface is available at https://cloud.muni.cz.
To sign in,
- select
ENIFRA CESNET, - click on
Sign In, {% reveal text="Show Screenshot" %}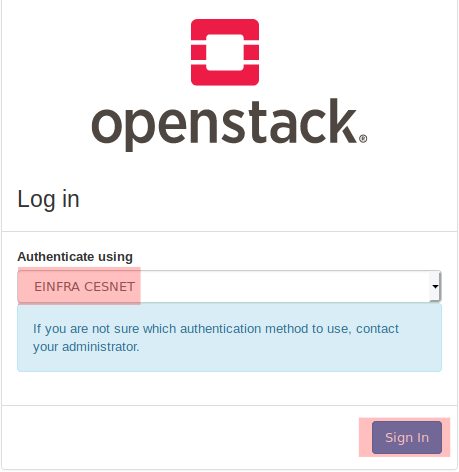 {% endreveal %}
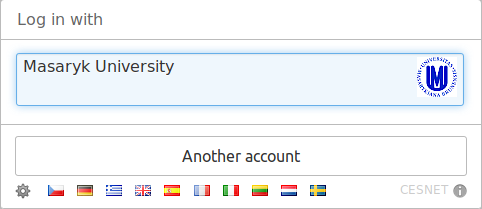
 - select your institution from the drop-down list (use the search box at the top as a filter),
{% reveal text="Show Screenshot" %}
 {% endreveal %}
 - provide your institution-specific sign-in credentials,
{% reveal text="Show Screenshot" %}
 {% endreveal %}
 - wait to be redirected back to our web interface.
Create Key Pair
All virtual machine instances running in the cloud have to be accessed remotely. The most common way of accessing a virtual machine instance remotely is the secure shell - ssh. Using ssh requires a pair of cryptographic keys.
-
To create a new ssh key pair, go to Project > Compute > Key Pairs and click the button "Create Key Pair" {% reveal text="Show Screenshot" %}
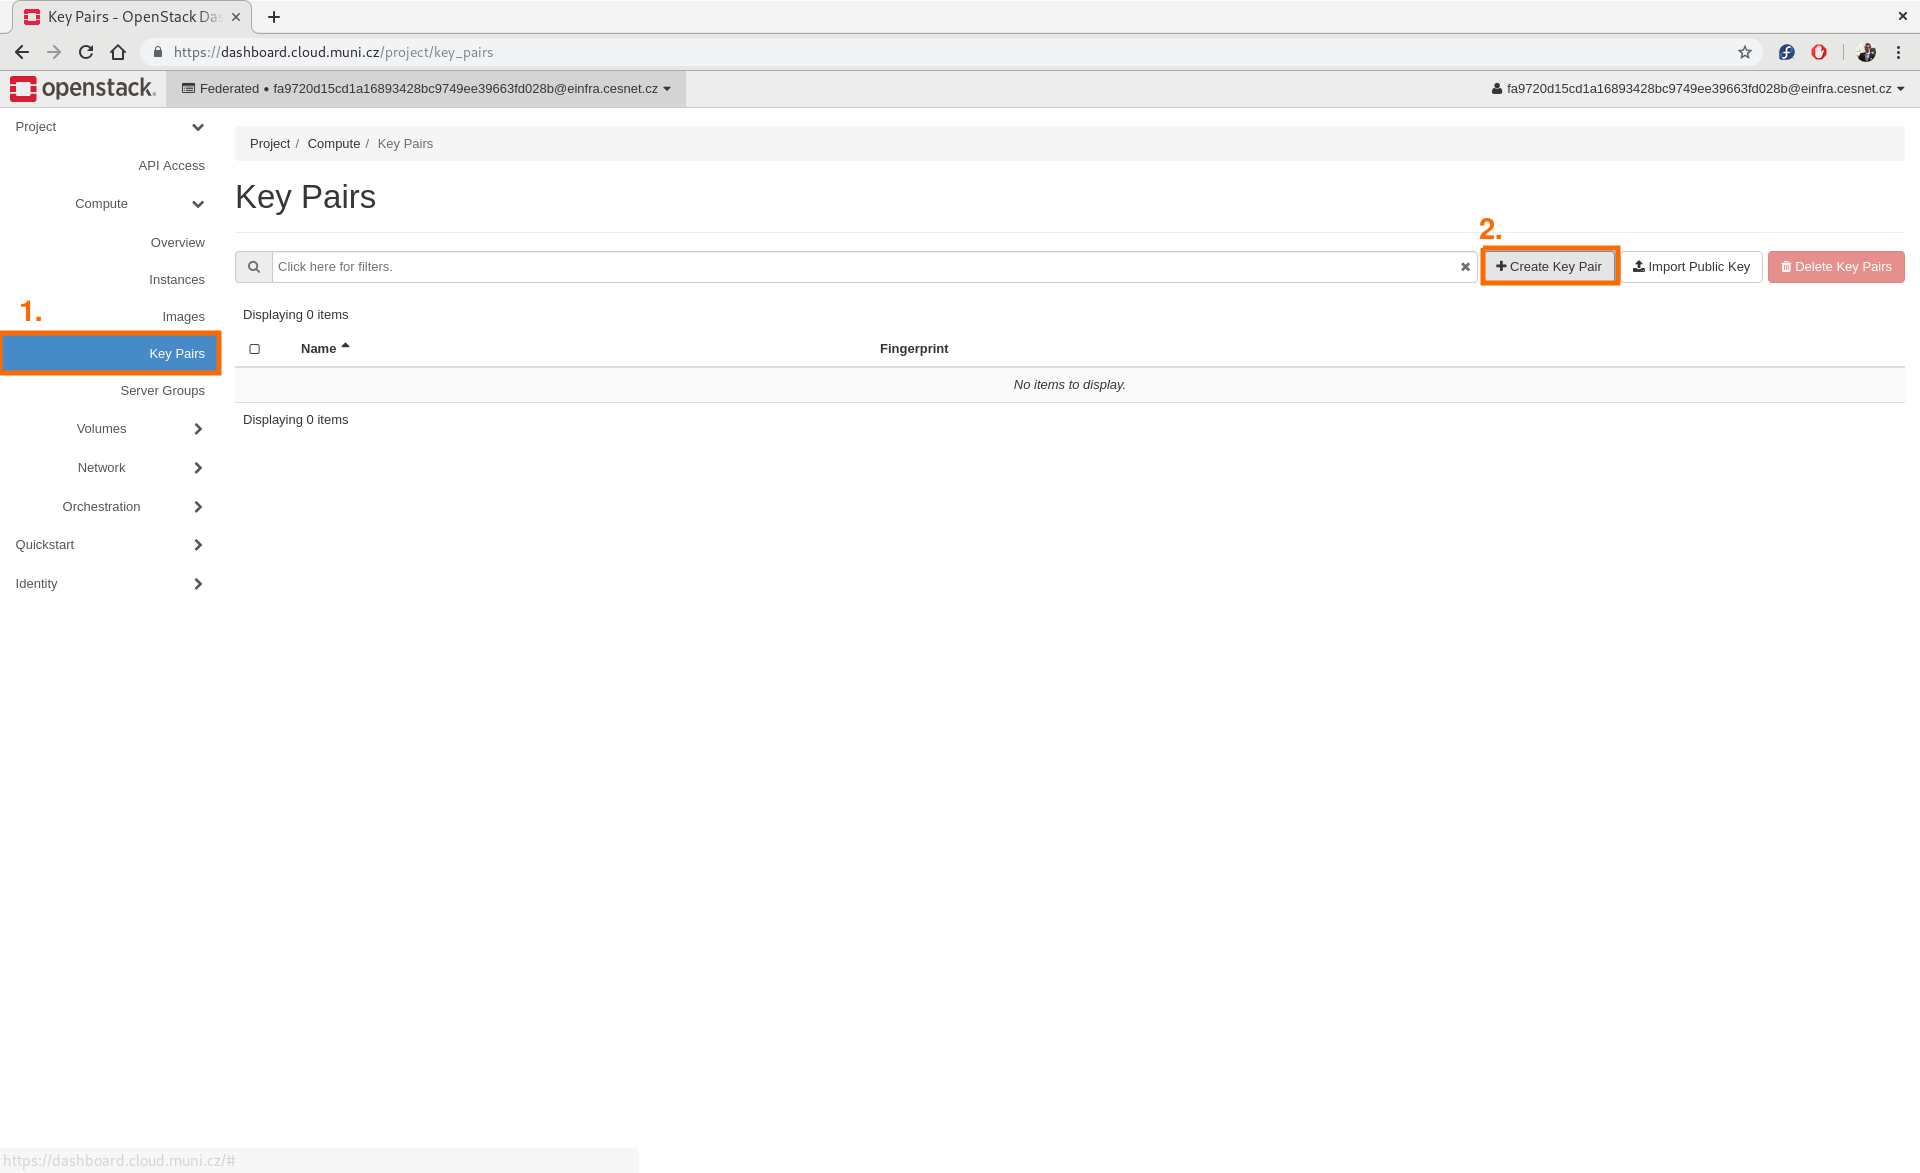 {% endreveal %}
 -
Name your new key and click on "Create Key Pair" again. Avoid using special characters, if possible. {% reveal text="Show Screenshot" %}
 {% endreveal %}
 -
You can see your newly created key pair and its fingerprint. We recommend you store the key in a safe location and back it up in case you accidentally delete it. {% reveal text="Show Screenshot" %}
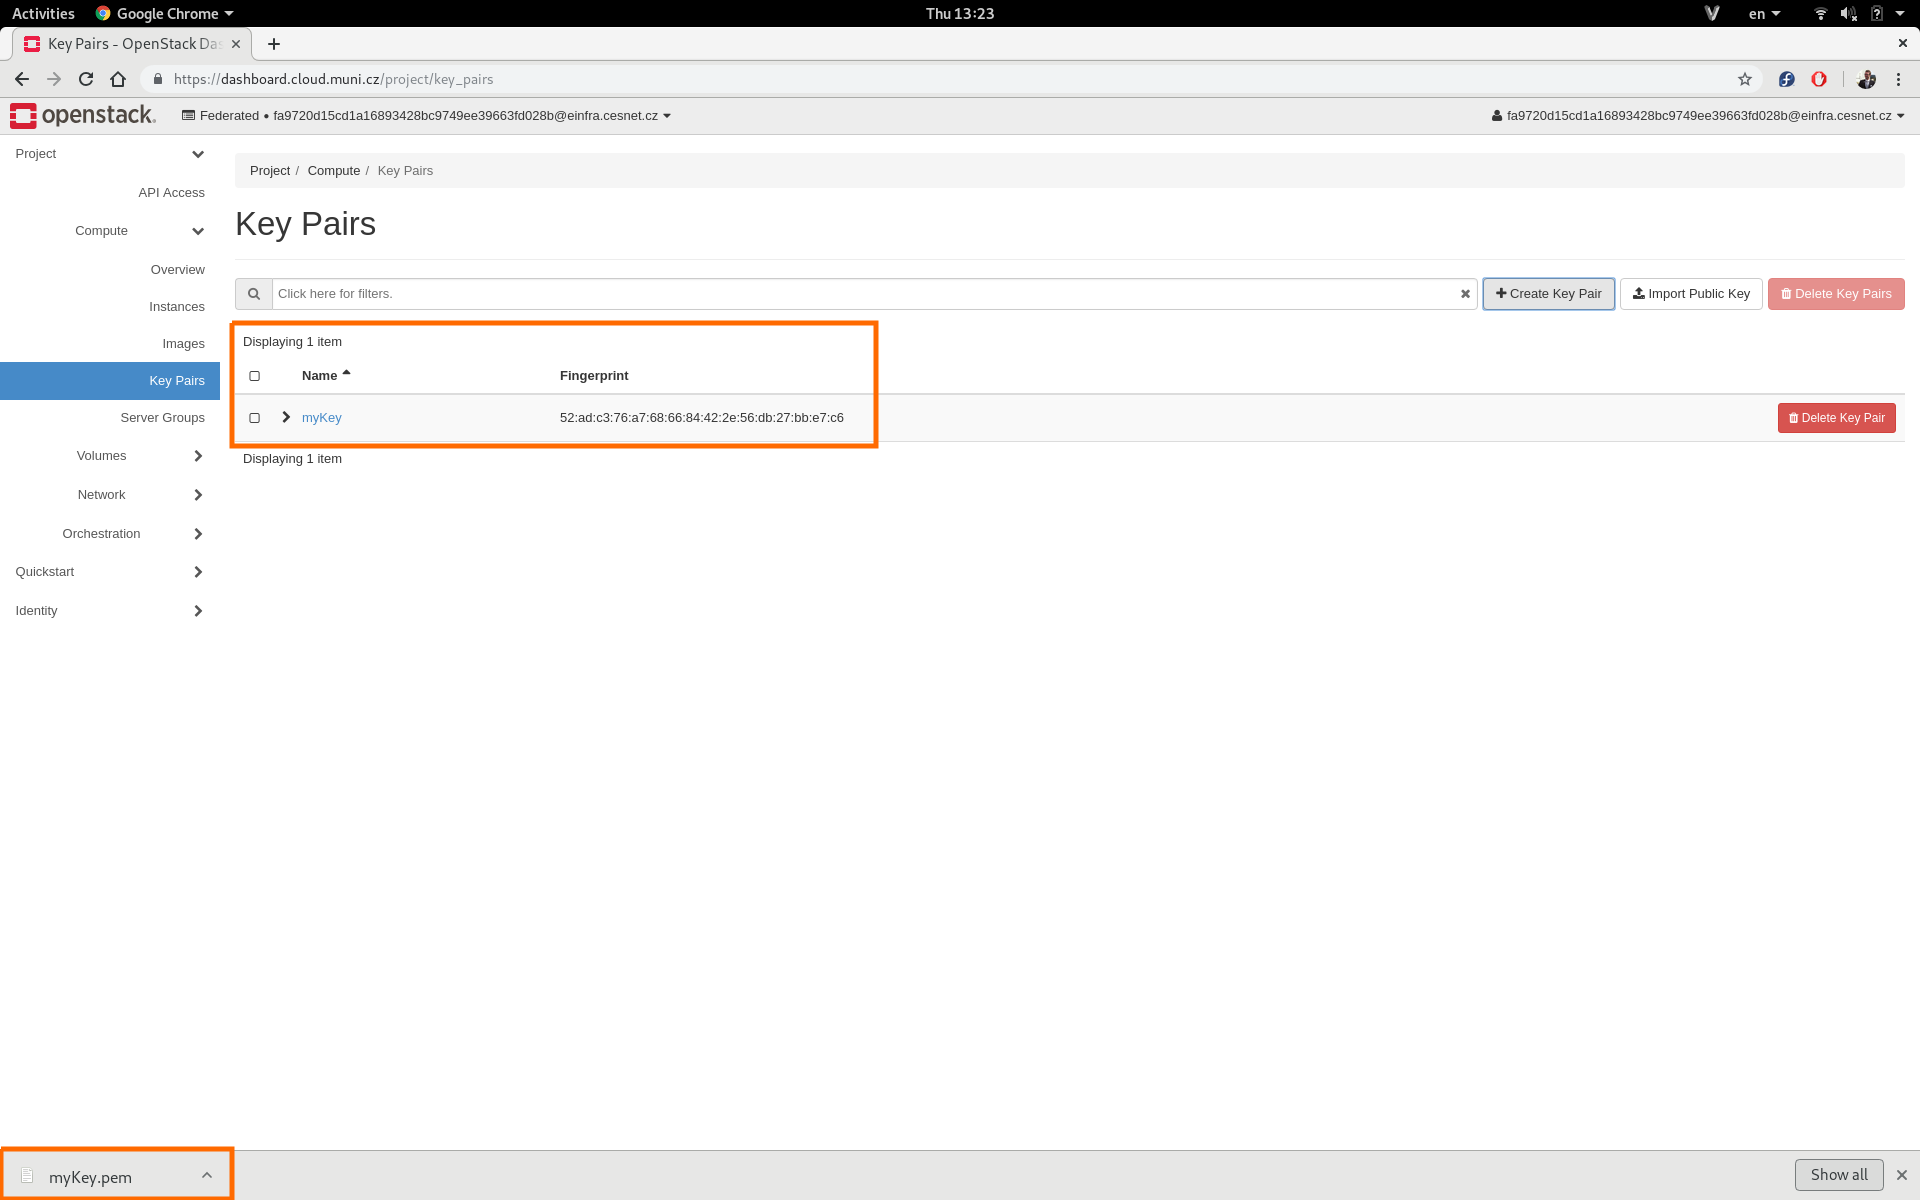 {% endreveal %}
Create Network
-
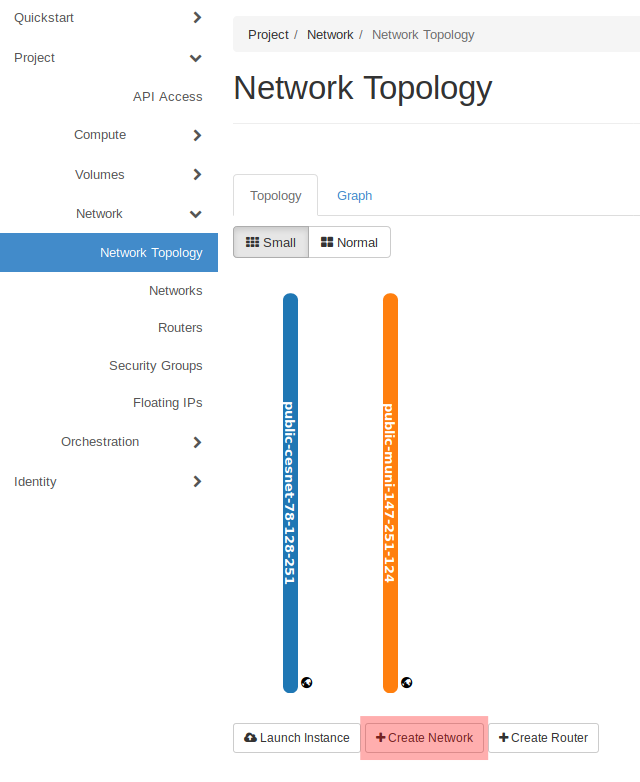
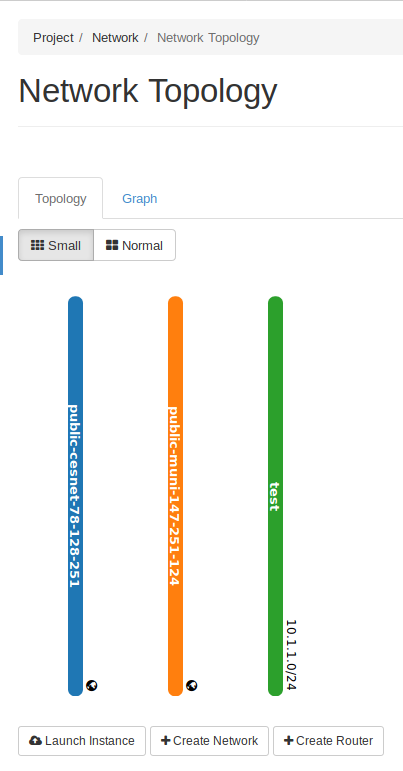
In Project > Network > Network Topology you can see the actual status of your networks. In the beginning there are only public networks visible, because you haven't created yet your network. You can do it by clicking on the button "Create Network". This network will serve as connection of your instances. {% reveal text="Show Screenshot" %}
 {% endreveal %}
 -
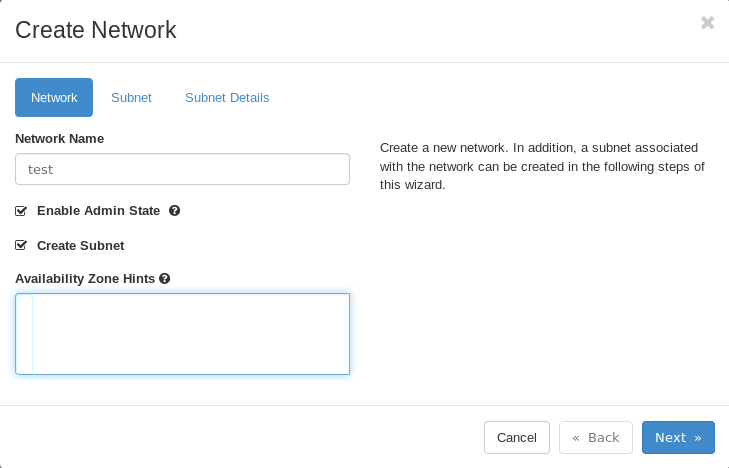
Name the network, which will join your instances, and click "Next". {% reveal text="Show Screenshot" %}
 {% endreveal %}
 -
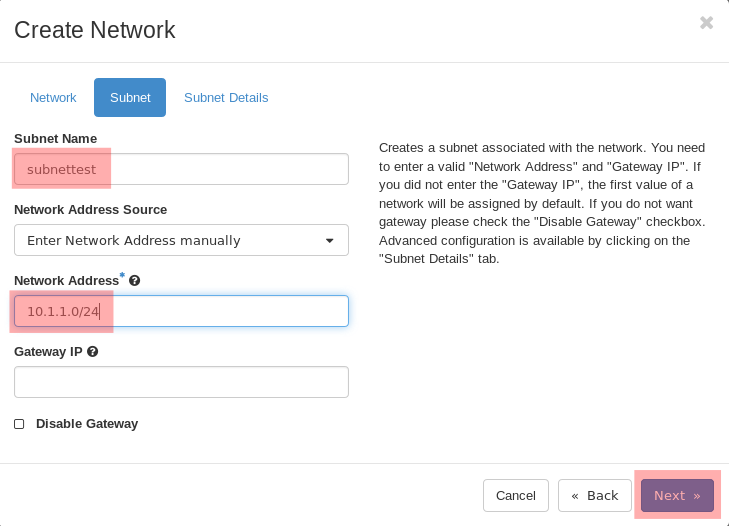
In Subnet tab name your subnet and choose a range of valid IP addresses (e.g. 10.1.1.0/24 or whatever you wanti) in CIDR format. The gateway will be automatically added as default (in our example it would be 10.1.1.1). Click "Next". {% reveal text="Show Screenshot" %}
 {% endreveal %}
 -
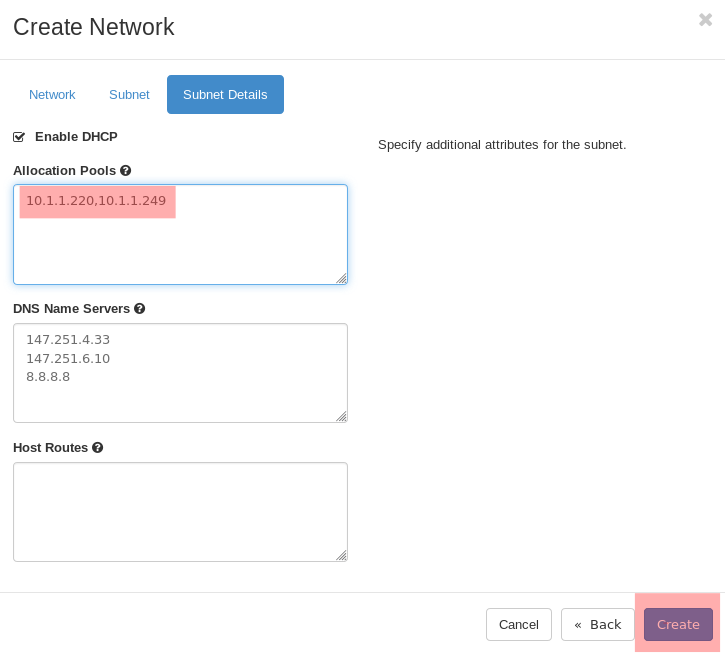
In Subnet Details tab in Allocation Pools you can choose what ranges will be served by DHCP server (what ranges will be automatically assigned if a machine will use DHCP server for joining a subnet). Use format in description (e.g. for range between 10.1.1.220 and 10.1.1.249 write: 10.1.1.220,10.1.1.249 - so limits separated by comma). You can leave default DNS servers. Click "Create". {% reveal text="Show Screenshot" %}
 {% endreveal %}
 -
Now in Project > Network > Network Topology you should see the new network created by you. {% reveal text="Show Screenshot" %}
 {% endreveal %}
Now you can continue by creating router.
Create Router
-
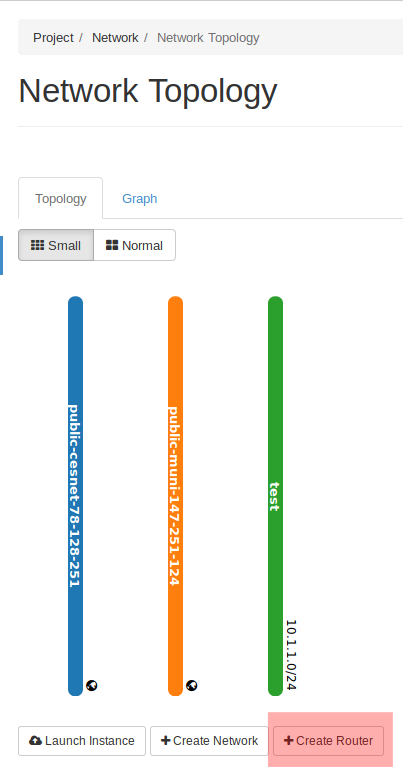
In Project > Network > Network Topology or in Project > Network > Routers push the button "Create Router". This router will serve as connection between your subnet and public network. {% reveal text="Show Screenshot" %}
 {% endreveal %}
 -
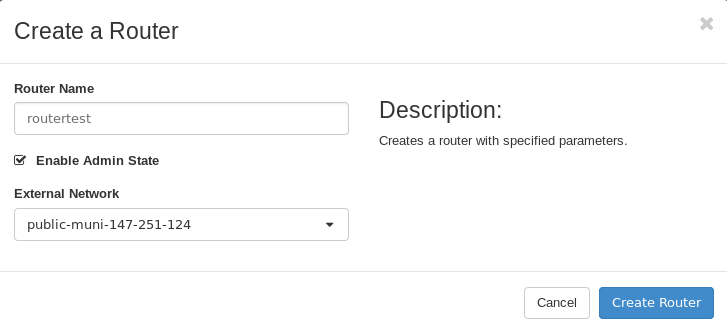
Add router name, select External Network (public network, through which you will be connected to internet) and click "Create Router". The router should be created and joined to public network. {% reveal text="Show Screenshot" %}
 {% endreveal %}
 -
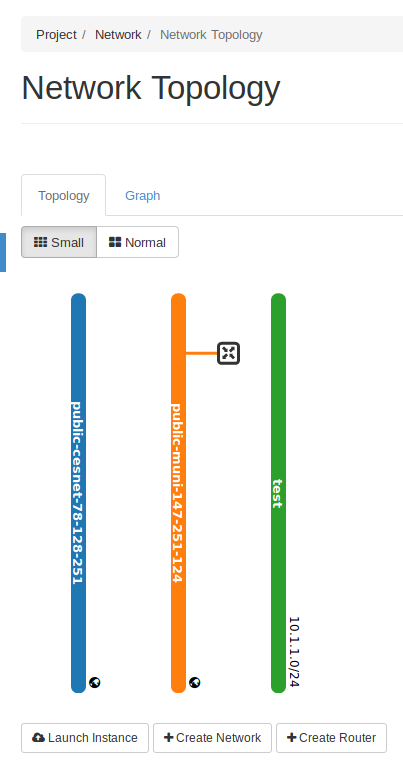
In Project > Network > Network Topology the router should be now visible. {% reveal text="Show Screenshot" %}
 {% endreveal %}
 -
Now you can go to Project > Network > Network Topology and create interface for connection to your subnet. Pointing over the router icon you will get to information window, where is a button "Add Interface". Click on it. {% reveal text="Show Screenshot" %}
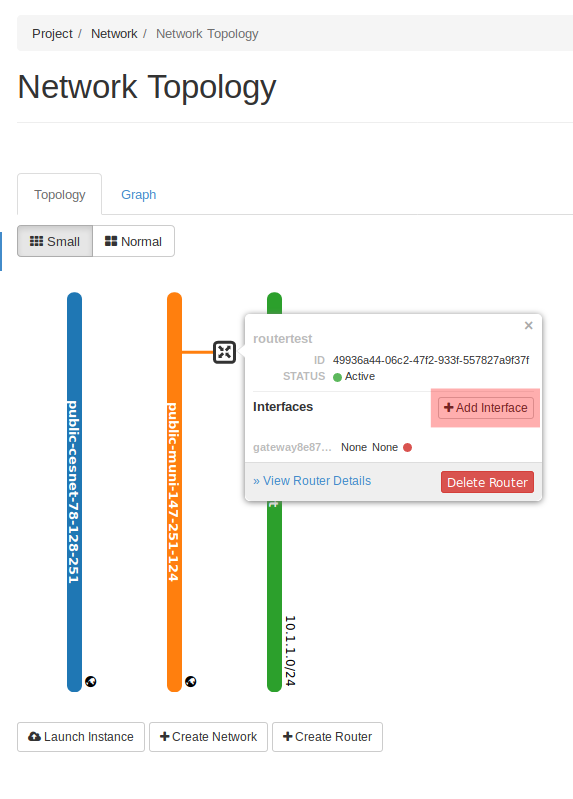 {% endreveal %}
 -
In opened pop-up window choose the available subnet. Click "Submit". {% reveal text="Show Screenshot" %}
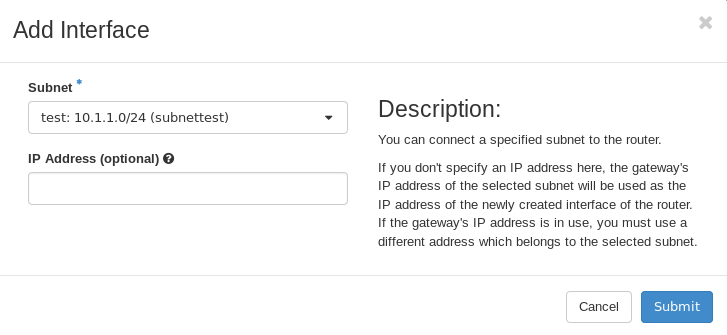 {% endreveal %}
 -
In Project > Network > Network Topology you can now see your network joined to public network. {% reveal text="Show Screenshot" %}
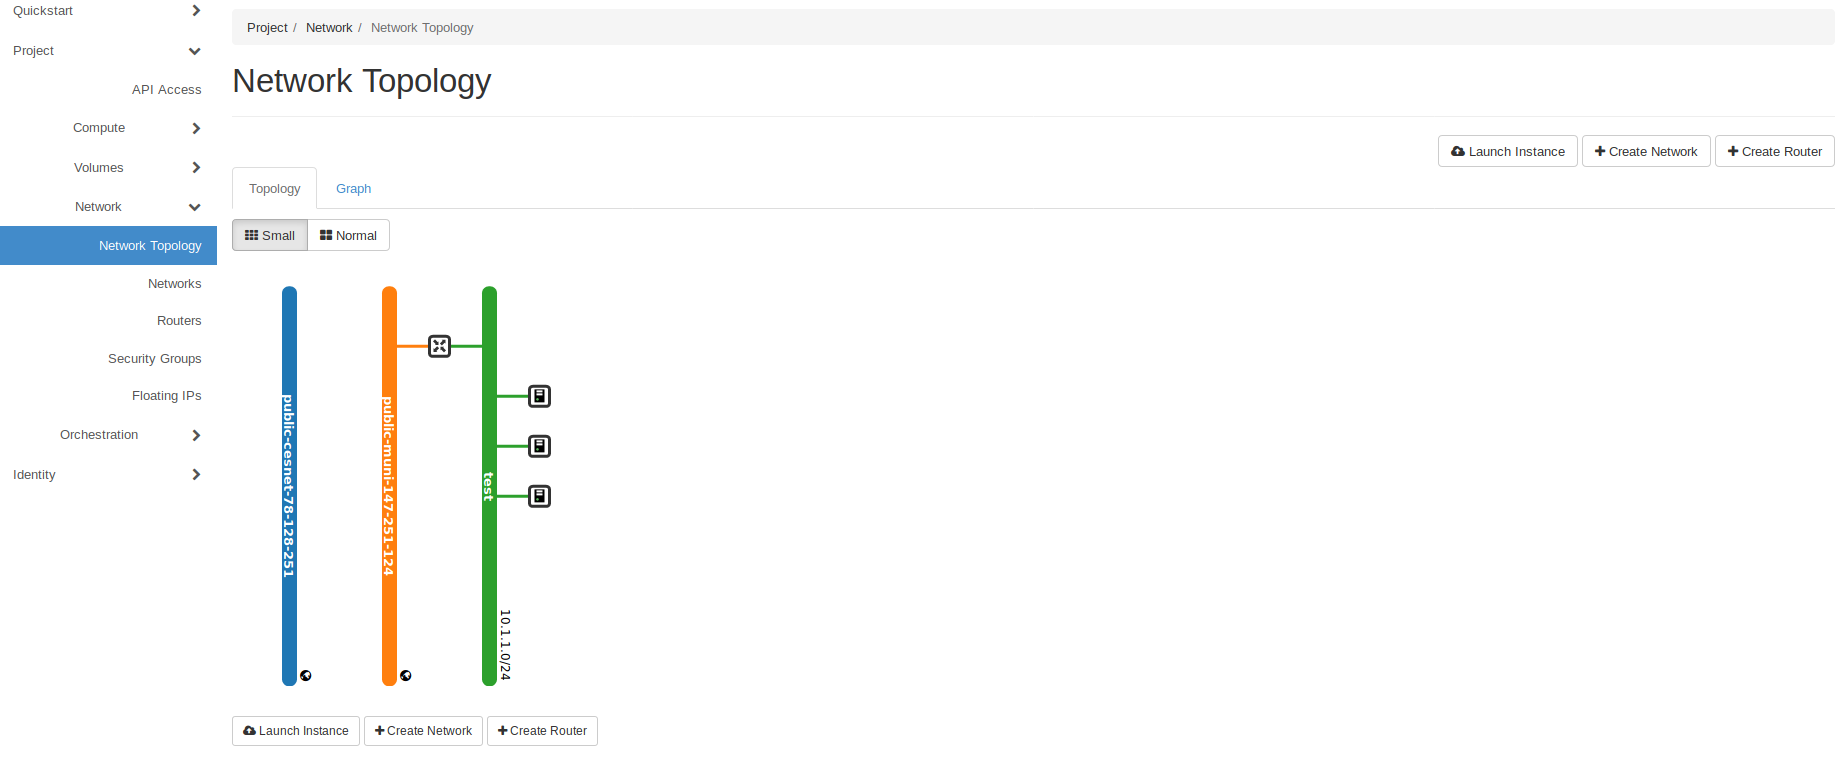 {% endreveal %}
Create Virtual Machine Instance(s)
The creation of virtual machine instances is very straight-forward:
-
In Compute > Instances push the button "Launch Instance" {% reveal text="Show Screenshot" %}
 {% endreveal %}
 -
Choose Instance Name, (optionally) Description, Availability Zone and Count of instances, how many VMs you want to create. If you are creating more instances, the number in format '-X' will be added automatically to the Instance Name for each instance. {% reveal text="Show Screenshot" %}
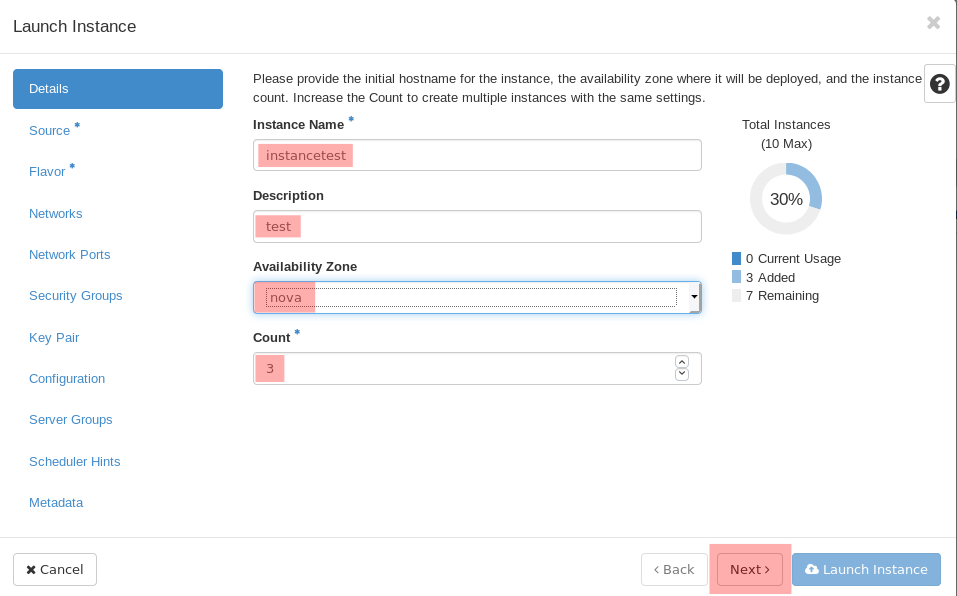 {% endreveal %}
 -
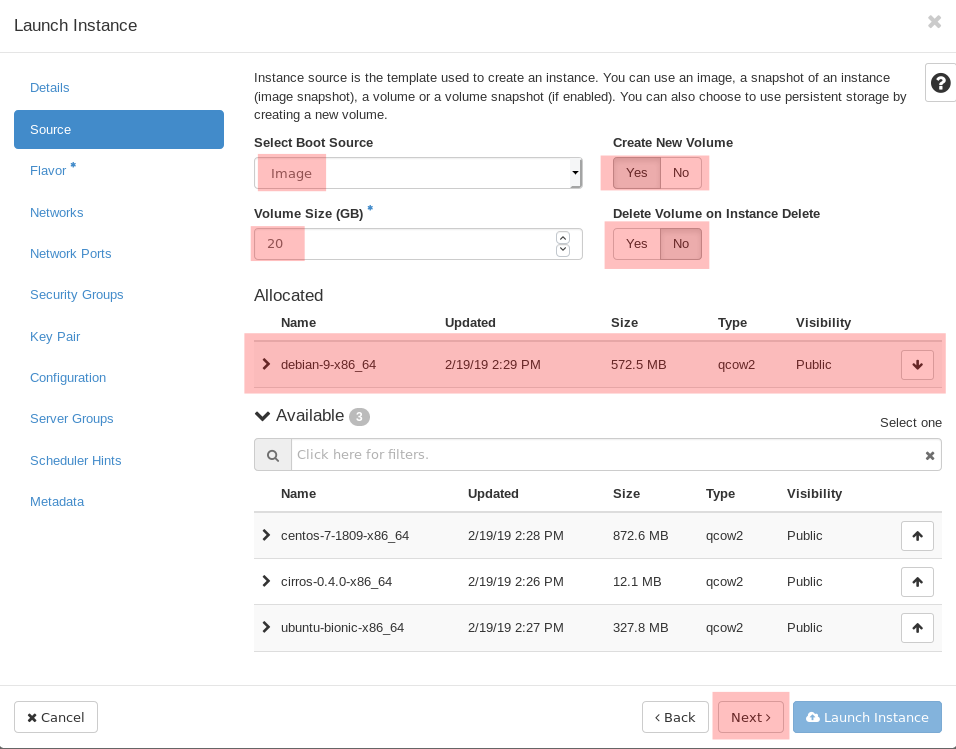
Choose the source of booting (you can boot your Instances from Image or a snapshot), Volume Size and from Available choose the desired image to boot from. According to the purpose of your project you can change these default settings Create New Volume and Delete Volume on Instance Delete (default "No"), if you want to use created volume and if you want to have not persistant volume. {% reveal text="Show Screenshot" %}
 {% endreveal %}
 -
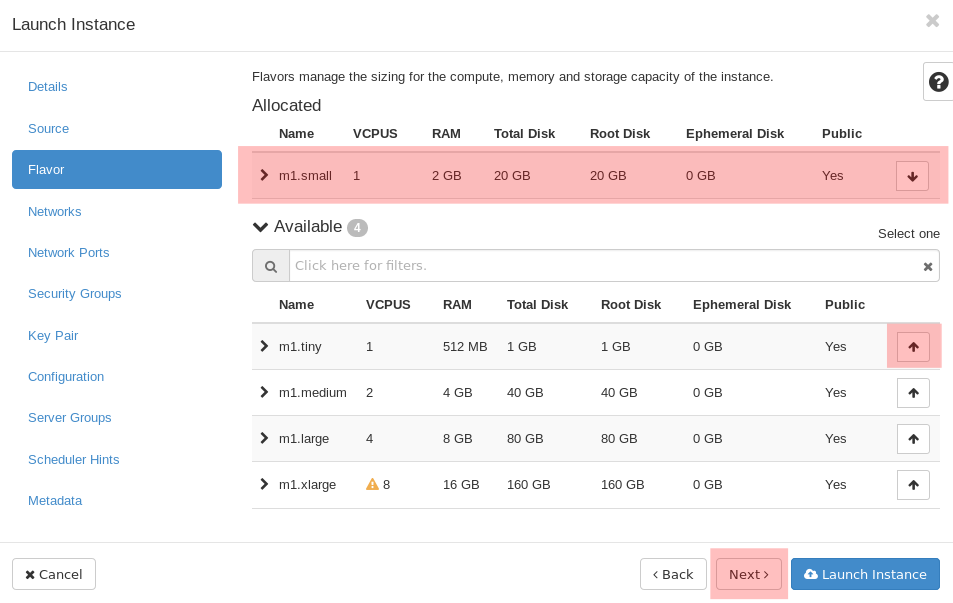
Pick the flavour - size of Instances created: VCPUs, RAM, Total Disk (Root). There are a few possibilities to choose from. You can add additional disk later. {% reveal text="Show Screenshot" %}
 {% endreveal %}
 -
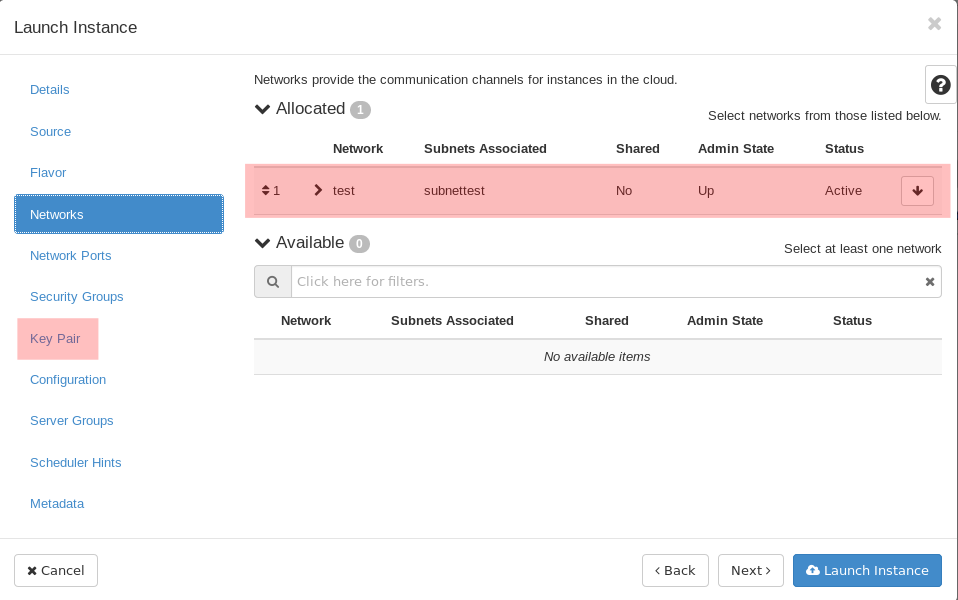
Next you check if your Instances were added to network created earlier {% reveal text="Show Screenshot" %}
 {% endreveal %}
 -
(optional) Security Groups tab you can see to what security group instances will be added. Usually you would like to stick with default option. Click on "Next". {% reveal text="Show Screenshot" %}
 {% endreveal %}
 -
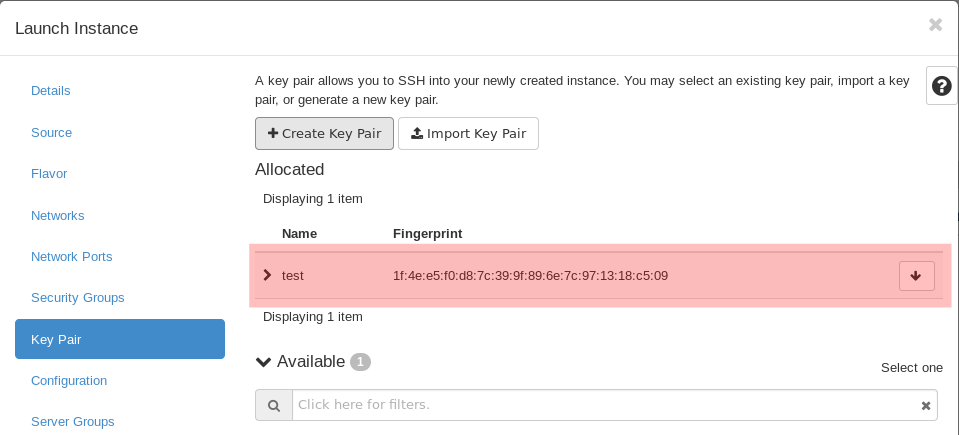
In Key Pair you need to add your earlier created public key. It will be added to authorized keys on instances and will allow you to ssh access to them from terminal/Putty or whatever you are using as ssh tool for connecting. {% reveal text="Show Screenshot" %}
 {% endreveal %}
 -
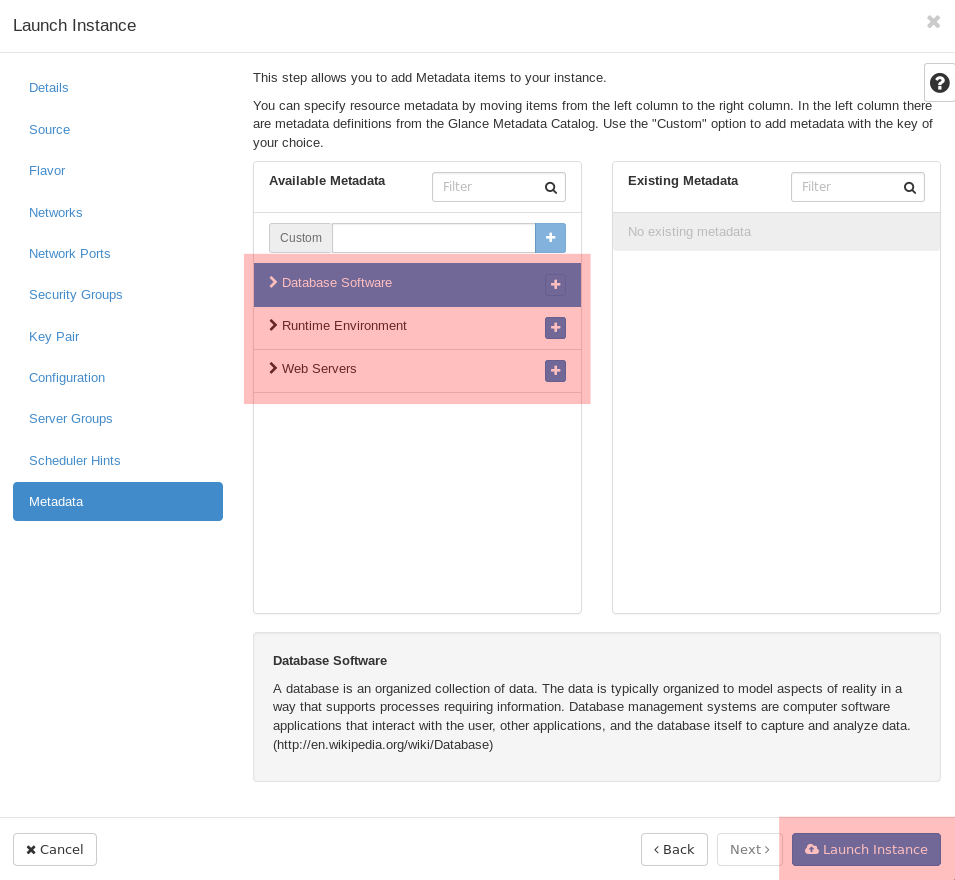
(optional) You can now go to Metadata (the left bottom tab) and choose the packages of software, which you want to have installed on your instances. {% reveal text="Show Screenshot" %}
 {% endreveal %}
 -
Then you can click on Launch Instance. After a few minutes they will be ready for using. {% reveal text="Show Screenshot" %}
 {% endreveal %}
Allocate and Associate a Floating IP (optional)
Sometimes we want to have an instance accessible from public network. In OpenStack project you can do it easily from the menu for each instance in Project > Compute > Instances or you can manage them more conscious way with at first allocating and then associating of IP address with instance. (You can of course later disassociate IP address from instance or disallocate IP address from your pool, when you don't need it, or associate with another instance and so on.)
-
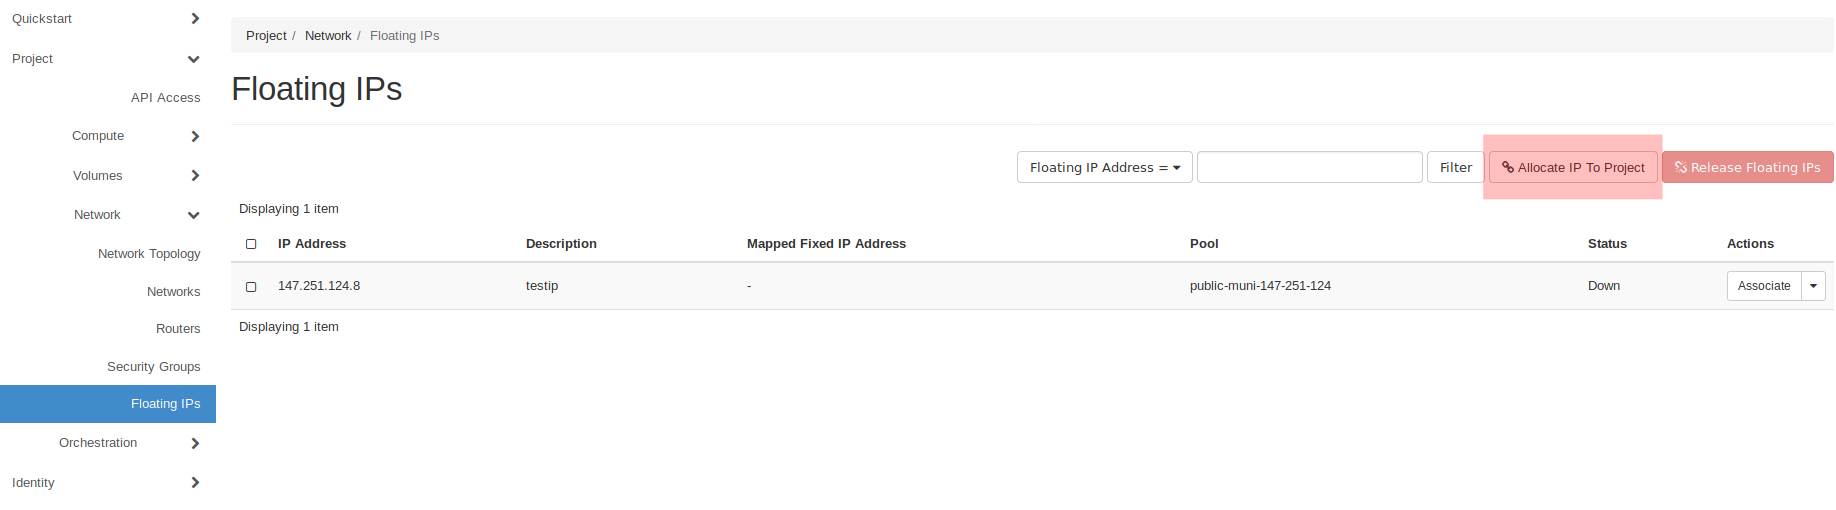
Go to Project > Network > Floating IPs and click on "Allocate IP to Project" {% reveal text="Show Screenshot" %}
 {% endreveal %}
 -
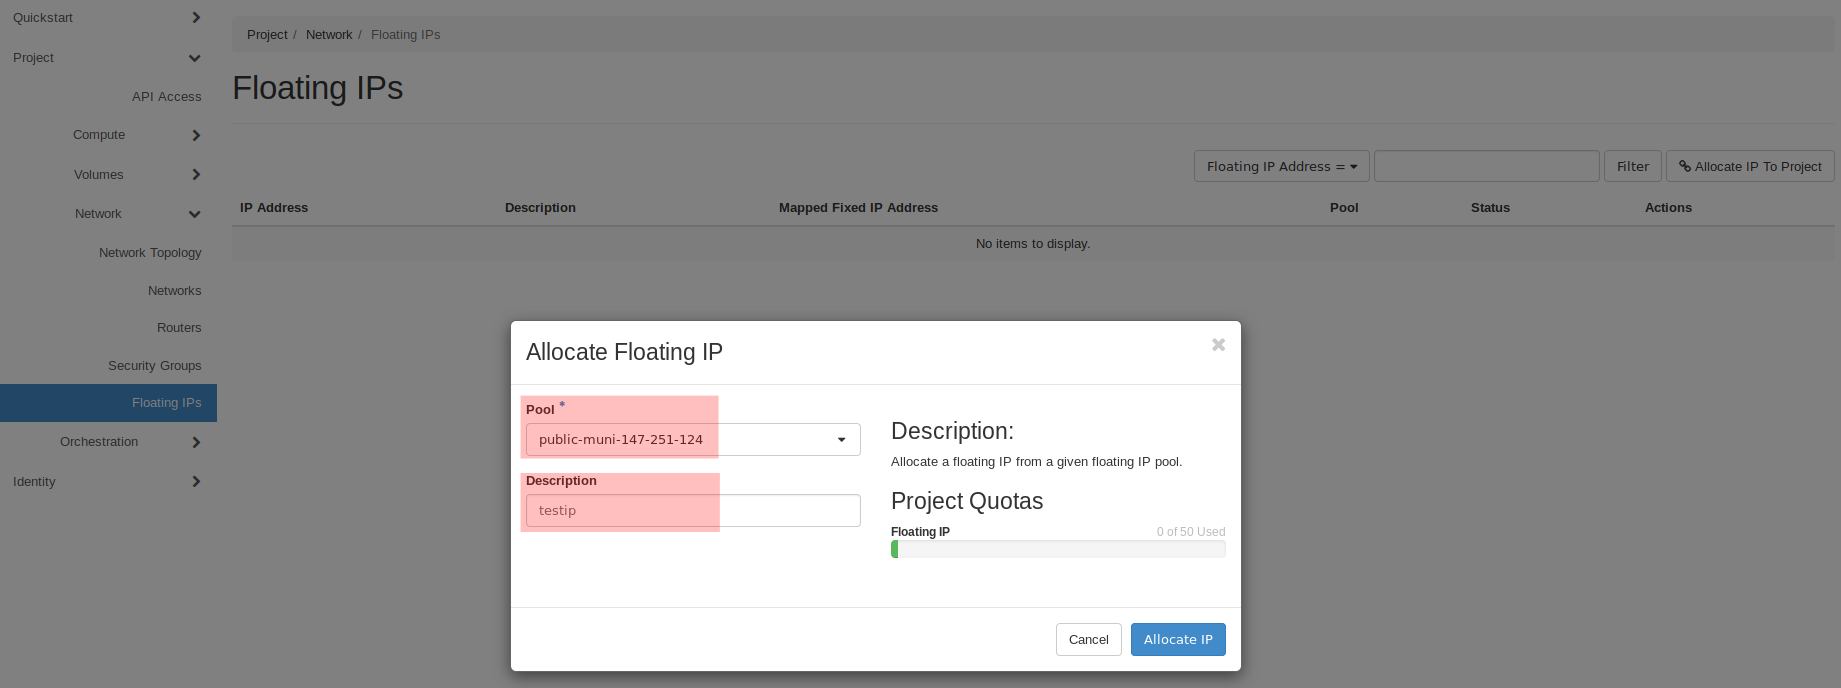
In pop-up window choose from which public network (Pool) do you want to allocate IP address for your instance eventually what will be the name of IP address. You have to choose the public network, to which your network is connected to, otherwise it won't work. Click on "Allocate". {% reveal text="Show Screenshot" %}
 {% endreveal %}
 -
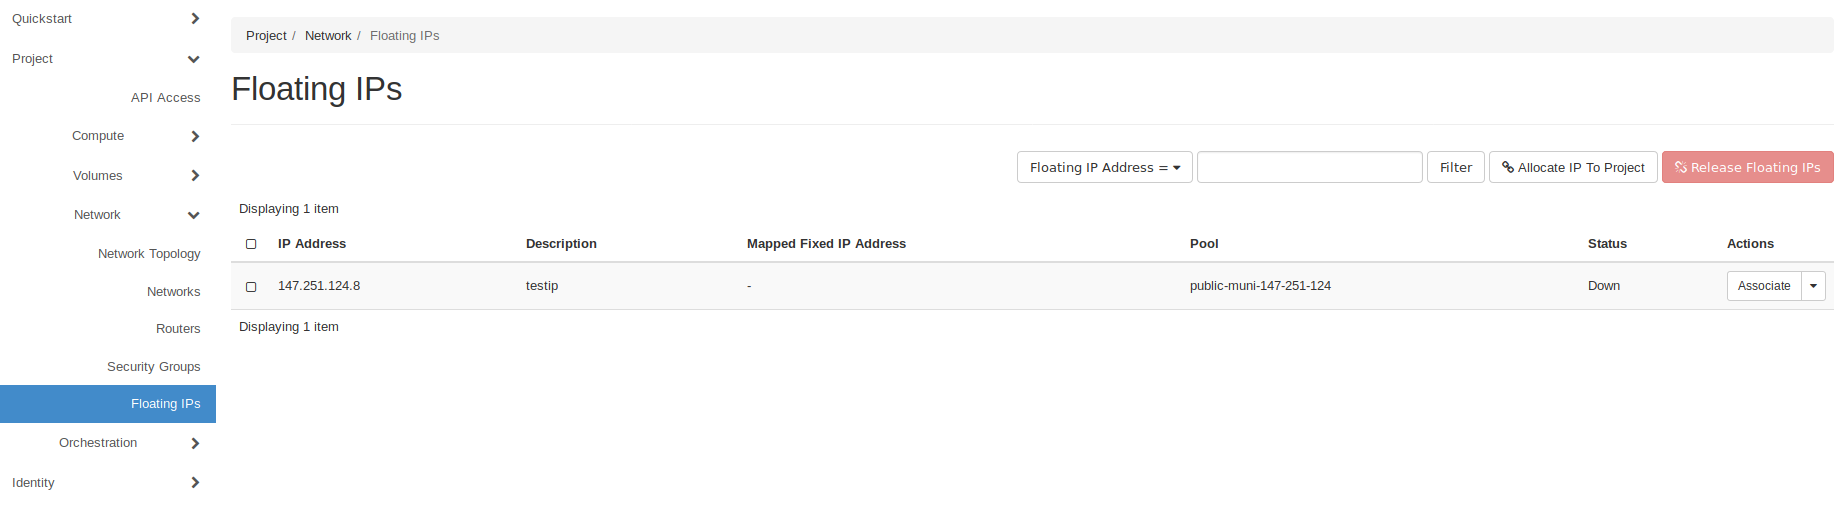
Now you should have IP address to your disposal. {% reveal text="Show Screenshot" %}
 {% endreveal %}
 -
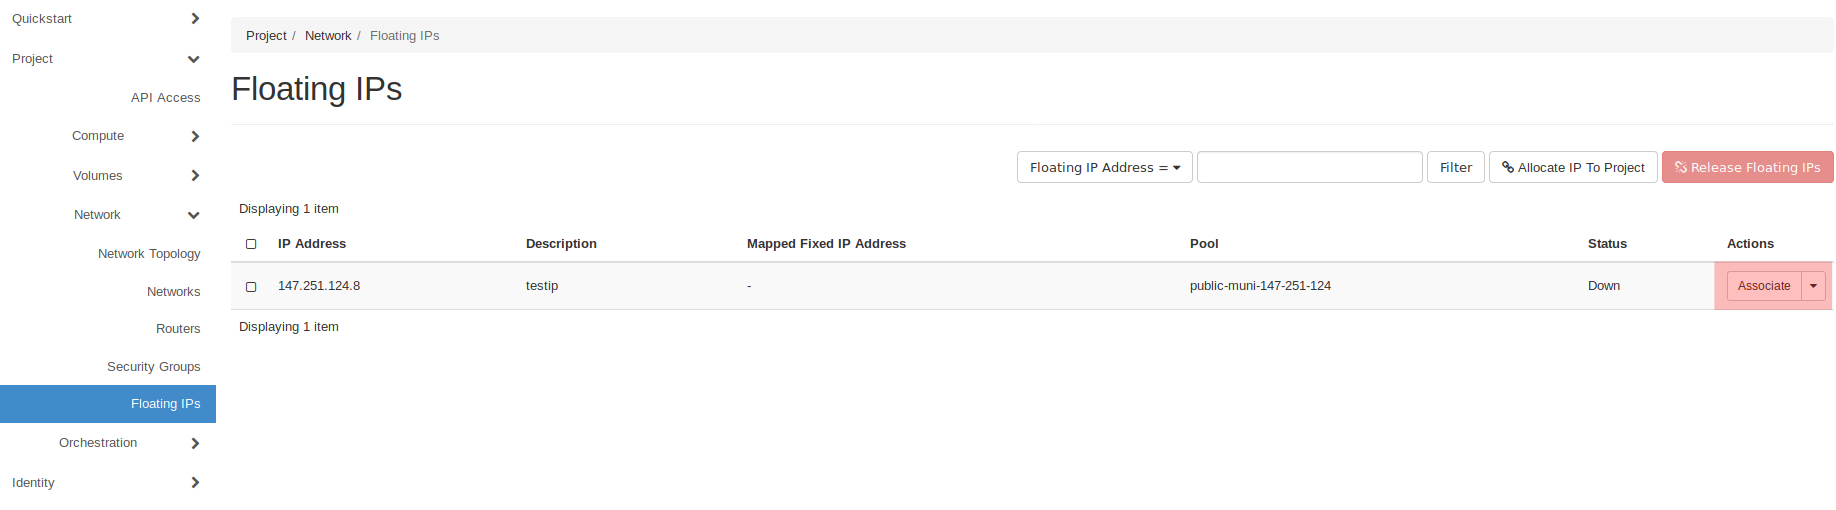
The next step is associate the free IP address to an instance. Click on "Associate". {% reveal text="Show Screenshot" %}
 {% endreveal %}
 -
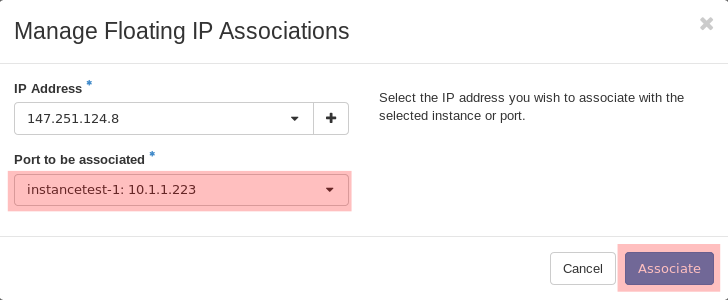
Select IP address and Port to be associated and click on "Associate". {% reveal text="show screenshot" %}
 {% endreveal %}
 -
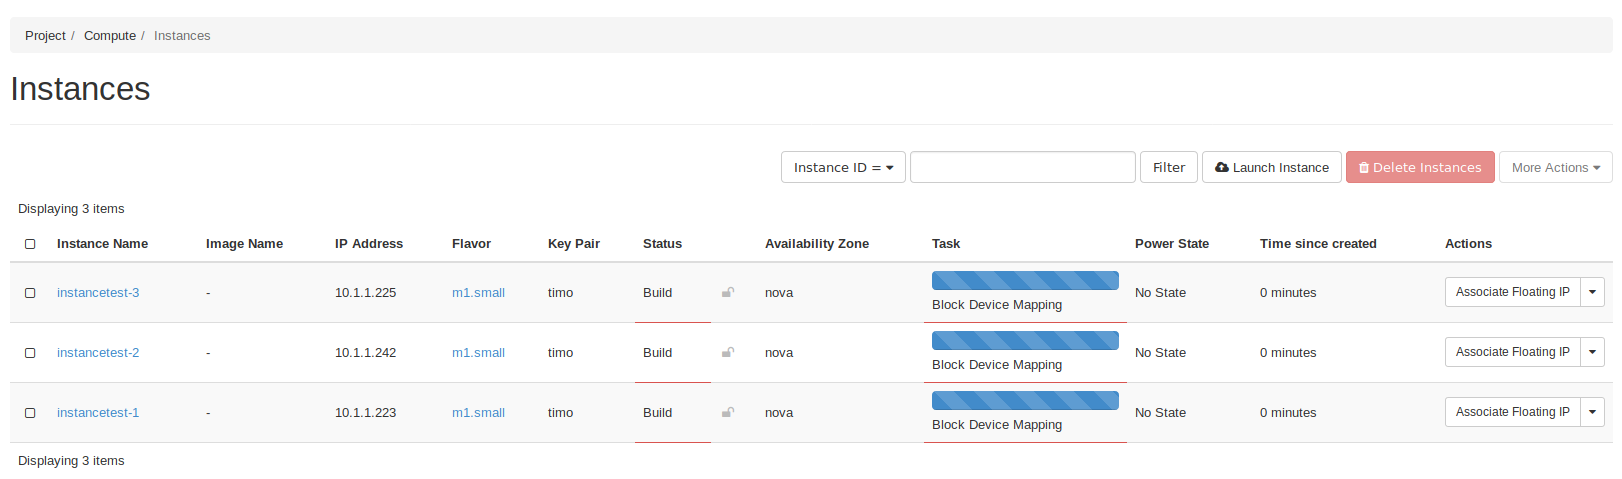
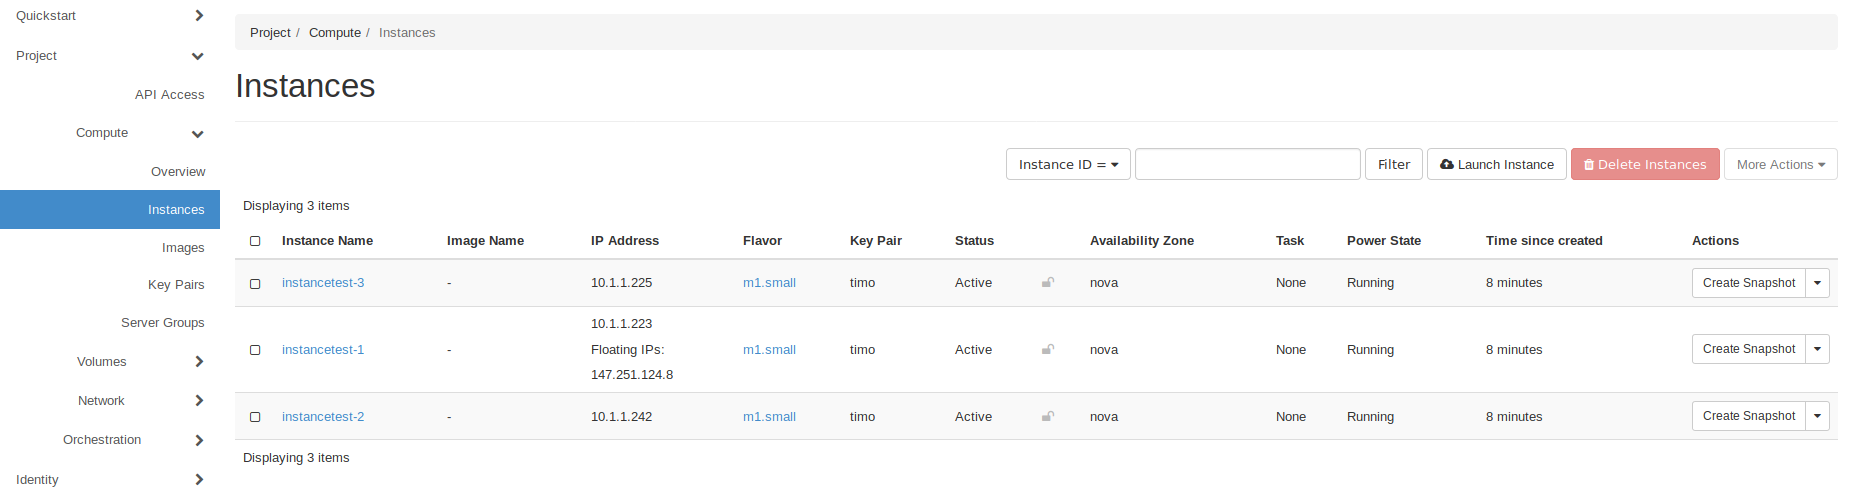
In Project > Compute > Instances you should be able to see instance with the associated public IP address. {% reveal text="show screenshot" %}
 {% endreveal %}
Create Volume
TODO